Introduction
Welcome to our comprehensive guide on installing the Verizon LTE Network Extender. In this article, we will provide you with a step-by-step walkthrough to help you successfully set up your network extender and ensure a seamless connectivity experience. Whether you’re facing weak signals or dropped calls, this guide will equip you with the knowledge to improve your network coverage and enhance your communication capabilities.
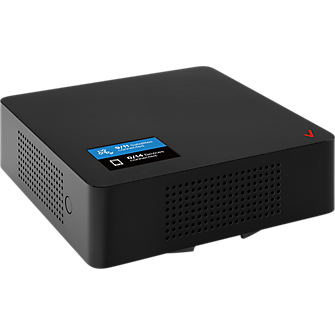
Why Install a Verizon LTE Network Extender?
Before we dive into the installation process, let’s understand the importance of a Verizon LTE Network Extender. This device acts as a mini-cell tower, boosting your cellular signals and expanding coverage within your home or office. By installing a network extender, you can enjoy:
- Enhanced Call Quality: Say goodbye to dropped calls and poor voice quality. The LTE network extender strengthens your signal, providing crystal-clear audio during phone conversations.
- Faster Data Speeds: Enjoy faster data transfer rates, enabling smooth browsing, streaming, and downloading on your connected devices.
- Improved Coverage: Eliminate dead zones within your property and experience reliable coverage in areas where the signal was previously weak or nonexistent.
Step-by-Step Guide to Installing Verizon LTE Network Extender
Step 1: Gather the Required Equipment
Before starting the installation process, make sure you have the following equipment ready:
- Verizon LTE Network Extender
- Ethernet cable
- Coaxial cable
- Power cord
- Coaxial splitter (if required)
- Internet router (with an available Ethernet port)
Step 2: Choose an Ideal Location
Selecting the right location for your network extender is crucial for optimal performance. Consider the following factors when choosing the installation spot:
- Proximity to a window: Placing the extender near a window can improve GPS reception and enable faster connection to the Verizon network.
- Centralized position: Position the extender in a central location within your home or office to ensure even signal distribution throughout the premises.
Step 3: Connect the Network Extender
- Connect one end of the Ethernet cable to the LAN port on your internet router.
- Connect the other end of the Ethernet cable to the WAN port on the network extender.
- Use the coaxial cable to connect the network extender to an available cable outlet on the wall. If you require multiple connections, use a coaxial splitter to divide the signal.
- Plug the power cord into the network extender and connect it to a power outlet.
Step 4: Network Extender Setup
- Power on the network extender and wait for the lights to stabilize. The Power, GPS, and Internet lights should turn solid green.
- Connect your phone to the network extender by enabling Wi-Fi calling in your device’s settings. Follow the on-screen instructions to complete the setup process.
Step 5: Perform Network Extender Registration
To ensure your network extender is correctly registered with Verizon, follow these steps:
- Visit the Verizon Wireless website and sign in to your account.
- Navigate to the “My Verizon” section and select “Devices.”
- Choose the option to activate the network extender and follow the provided instructions.
- Once activated, your network extender will be operational within a few minutes.
Troubleshooting Tips
In case you encounter any issues during or after the installation, here are some troubleshooting tips to help you:
- No Power: Ensure that the power cord is securely connected to both the network extender and the power outlet.
- No GPS Signal: Reposition the network extender near a window to improve GPS reception.
- Weak Signal: Check that all cable connections are secure and try relocating the network extender to a more centralized position.
- Registration Issues: Double-check the activation process on the Verizon Wireless website or contact Verizon support for assistance.
Conclusion
Congratulations! You have successfully installed your Verizon LTE Network Extender, expanding your network coverage and enhancing your communication experience. By following the step-by-step guide and troubleshooting tips provided in this article, you can now enjoy reliable signals, improved call quality, and faster data speeds. Stay connected with ease and bid farewell to network-related frustrations.