Introduction
Welcome to the ultimate guide for using the ResMed AirSense 10, your gateway to a restful and rejuvenating sleep. We understand the importance of high-quality sleep and the positive impact it can have on your overall well-being. In this comprehensive user guide, we will walk you through every aspect of the ResMed AirSense 10, providing you with detailed instructions and tips to maximize the effectiveness of your sleep therapy. Get ready to unlock the full potential of your device and experience nights filled with uninterrupted, refreshing sleep.
Understanding the ResMed AirSense 10
The ResMed AirSense 10 is a cutting-edge sleep therapy device designed to treat sleep apnea and other related sleep disorders. It utilizes advanced technology and innovative features to deliver a personalized and comfortable therapy experience. Let’s delve into the key components and functionalities of this exceptional device:
1. Design and User-Friendly Interface
The ResMed AirSense 10 boasts an elegant and intuitive design, making it incredibly user-friendly. With its sleek appearance and compact size, it seamlessly blends into your bedroom environment. The user interface is clear, well-organized, and easy to navigate, ensuring effortless control and customization.
2. Air Pressure and Comfort Settings
One of the standout features of the ResMed AirSense 10 is its ability to adjust air pressure levels according to your specific needs. The device is equipped with an advanced algorithm that continuously monitors your breathing patterns, automatically adapting the pressure to ensure optimal comfort throughout the night. This personalized approach ensures that you receive the most effective therapy possible.
3. Humidification and Climate Control
Dry air can often lead to discomfort during sleep therapy. The ResMed AirSense 10 addresses this concern by incorporating a humidification system and climate control feature. By maintaining an ideal level of humidity, it prevents dryness in the airway, reducing nasal congestion and enhancing overall comfort. The climate control feature further adjusts the temperature of the delivered air, providing a soothing and pleasant experience.
Getting Started with Your ResMed AirSense 10
Now that you have a basic understanding of the device, let’s dive into the essential steps to ensure a seamless setup and usage:
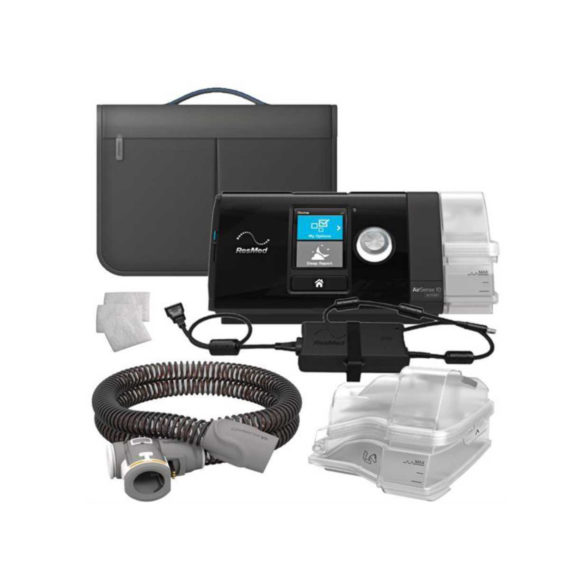
1. Unboxing and Assembling
When you receive your ResMed AirSense 10, carefully unbox the package, ensuring all components are present. The standard package typically includes the device itself, a humidifier, a power cord, a water chamber, a filter, and a user manual. Assemble the device by securely attaching the humidifier and water chamber according to the provided instructions.
2. Powering On and Setup
Connect the power cord to the device and plug it into a reliable power source. The ResMed AirSense 10 features a user-friendly control panel with an easy-to-read display. Power on the device and follow the on-screen prompts to set up the basic preferences such as language, date, and time.
3. Mask Fitting and Adjustment
Selecting the right mask and ensuring a proper fit is crucial for optimal sleep therapy. Refer to the ResMed AirSense 10 user manual for detailed instructions on mask selection, fitting, and adjustment. A well-fitted mask will enhance comfort, prevent air leaks, and maximize the effectiveness of your therapy.
4. Daily Maintenance and Cleaning
Regular maintenance and cleaning of your ResMed AirSense 10 are essential for prolonged durability and hygiene. Follow the manufacturer’s guidelines provided in the user manual to ensure proper cleaning of the device, water chamber, and mask. Additionally, replace the filter as recommended to maintain optimal air quality.
Troubleshooting and Frequently Asked Questions
To further assist you in your journey with the ResMed AirSense 10, we have compiled a list of common troubleshooting scenarios and frequently asked questions:
- Q: My device is producing a loud noise. How can I fix this?
- A: Ensure that the air filter is clean and properly inserted. If the issue persists, contact customer support for further assistance.
- Q: How often should I replace the water chamber?
- A: It is recommended to replace the water chamber every six months or as indicated by the manufacturer.
- Q: Is the ResMed AirSense 10 travel-friendly?
- A: Yes, the ResMed AirSense 10 is designed to be compact and portable, making it convenient for travel purposes. Follow the guidelines in the user manual for safe transportation.
For additional troubleshooting and detailed answers to frequently asked questions, refer to the ResMed AirSense 10 user manual or reach out to our dedicated customer support team.
Conclusion
Congratulations! You are now equipped with the knowledge and guidance to optimize your sleep therapy using the ResMed AirSense 10. By following the instructions in this user guide, you can ensure a comfortable and effective sleep therapy experience. Remember, quality sleep is vital for your overall well-being, and the ResMed AirSense 10 is your trusted companion on this journey to better sleep. Embrace the power of technology and enjoy nights filled with uninterrupted, restorative sleep.
Remember, for any further inquiries or assistance, our dedicated customer support team is always ready to help. Sleep well, wake up refreshed, and embrace a healthier, happier you with the ResMed AirSense 10!